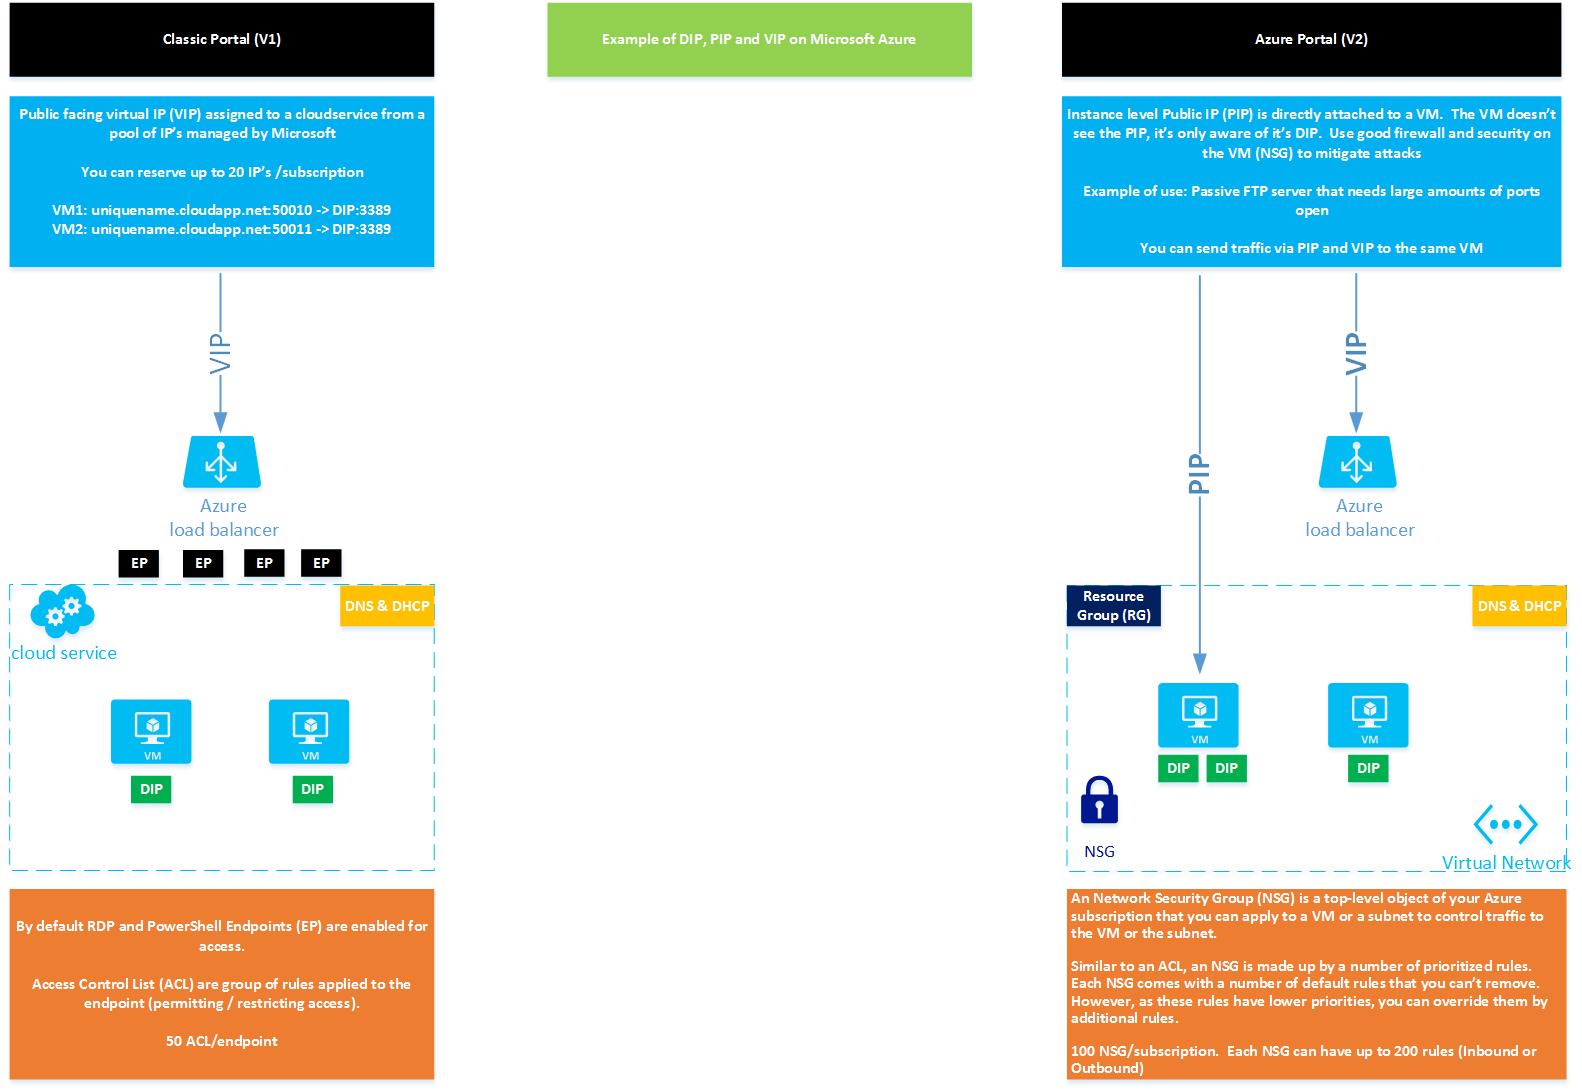
If you are in a position where you need to connect an ExpressRoute circuit using Azure Resource Manager (ARM), there is some documentation out there to help you with setting this up (links below). As the ARM portal went General Availability (GA) on 2nd December 2015 it makes sense to start building your environment using the current portal (https://portal.azure.com) compared to the classic portal (https://manage.windowsazure.com) if you are in a position to do this.
Note: Resources tied to the classic portal can’t currently communicate with resources tied to the current portal (as of this writing – this might change so please look at http://azure.microsoft.com for more information).
Links to good material / documentation:
Official Microsoft Azure Documentation on Express Route:
https://azure.microsoft.com/en-gb/documentation/articles/expressroute-howto-circuit-arm/
Really good blog that takes you through the entire process of setting up an ExpressRoute and connecting this using ARM. The below PowerShell command lets are also courtesy of the below blog:
http://blogs.technet.com/b/privatecloud/archive/2015/10/23/creating-and-connecting-an-expressroute-circuit-with-azure-resource-manager.aspx
ExpressRoute FAQ:
https://azure.microsoft.com/en-gb/documentation/articles/expressroute-faqs/
Below is an example of setting up an ExpressRoute circuit using ARM.
Assumption:
ExpressRoute circuit has been provisioned by ISP / NSP, therefore they would have also configured the Private or Public Peering.
The steps that will be covered:
- Install Azure PowerShell (WMF 5.0)
- Install AzureRM (Resource Manager) PowerShell modules
- Create a new VNET (Virtual Network) to link to your ExpressRoute circuit
- Create an ExpressRoute Gateway
- Connect the ExpressRoute Gateway to your ExpressRoute circuit
/*******************************************************/
STEP 1
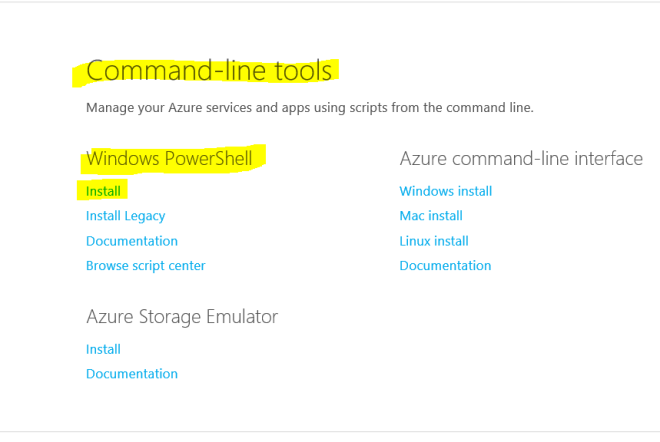
Depending on what version of Windows you are running (assuming you have Windows 7, 8 or 10) I would recommend to download Windows Management Framework (WMF) 5.0 from the link below or type in Azure SDK using Bing / Google (link below) and download Windows PowerShell under command-line tools.
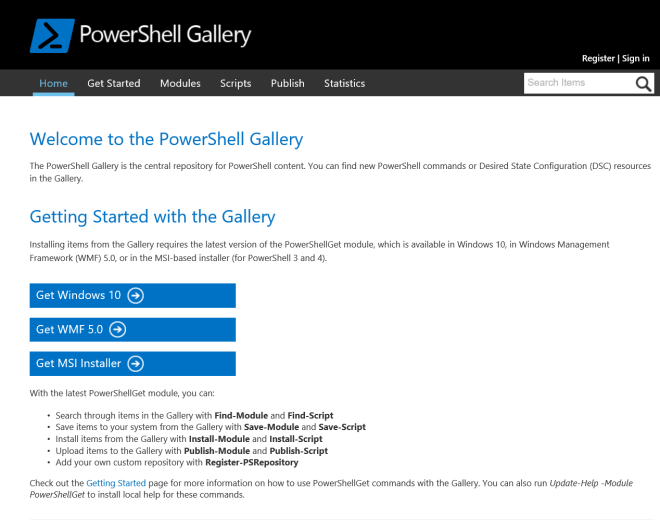
http://www.powershellgallery.com/
https://azure.microsoft.com/en-us/downloads/
Note: You will most likely need to reboot your machine
/*******************************************************/
STEP 2
Once WMF is installed, open up Microsoft Azure PowerShell or Windows PowerShell ISE (Integrated Scripting Environment) – Preferred.
Next we will install the Azure Resource Manager (ARM) modules (there are few ways but below should suffice).
Note: If below command let doesn’t work then follow Step 1 again to reinstall and reboot machine.
Link: http://www.powershellgallery.com/packages/AzureRM/
#Save AzureRM modules locally
Save-Module -Name AzureRM -Path C:\AzureRMmodules\
#Install the AzureRM modules
Install-Module -Name AzureRM
#Import all of the AzureRM* modules within the known semantic version #range
Import-AzureRM
#Add AzureRmAccount Module
Add-AzureRmAccount
#Login to your Azure Subscription
Login-AzureRmAccount
#Select the subscription (if you have multiple) of where you would like to #connect up the ExpressRoute circuit
Get-AzureRmSubscription (list all the subscriptions)
Select-AzureRmSubscription -SubscriptionId “”
#To get details of your provisioned ExpressRoute circuit with the service #key:
Get-AzureRmExpressRouteCircuit
/*******************************************************/
STEP 3
In this example, I am assuming we are setting up the ExpressRoute onto a fully managed MPLS network, therefore the Public or Private peering will be taken care off by the Internet Service Provider (ISP) or Network Service Provider (NSP).
When we setup the Virtual Network (VNET) on Azure we need to specify the address space we will be using:
i.e. A VNET will have an address space(s) – range from which we can set up one or more subnets.
Example:
Address Space: 10.174.4.0/22
Subnet1: 10.174.4.0/25 (workload here will be able to communicate with rest of the MPLS network)
#Create a Virtual Network (VNET) with subnet1 and gateway subnet
#Give a name of the Subnet
$subnet1Name = “Subnet_Name1”
#The address range for the subnet
$subnet1AddressPrefix = “10.174.236.4.0/25”
#Give a name of the Gateway Subnet
$subnet2Name = “ExpressRoute_Gateway_Subnet_Name”
#The address range for the Gateway Subnet (must be /28 as a minimum)
$subnet2AddressPrefix = “10.174.7.0/28”
#Give a name of the Virtual Network
$vNetName = “Virtual_Network_Name”
#Specify Virtual Network Address Space
$vNetAddressPrefix = “10.174.236.4.0/22“
#The name of the Resource Group where the ExpressRoute has been setup #(this would have been done during circuit provisioning)
$rg = “Your_ExpressRoute_ResourceGroup_Name”
#The Resource Group Location
$rglocation = “North Europe”
#S1 and S2 variables will store the Subnet Configuration
$s1 = New-AzureRmVirtualNetworkSubnetConfig -Name $subnet1Name -AddressPrefix $subnet1AddressPrefix
$s2 = New-AzureRmVirtualNetworkSubnetConfig -Name $subnet2Name -AddressPrefix $subnet2AddressPrefix
#Create the Virtual Network using the above stored variables
vnet = New-AzureRmVirtualNetwork -Name $vNetName -ResourceGroupName $rg -Location $rglocation -AddressPrefix $vNetAddressPrefix -Subnet $s1, $s2
/*******************************************************/
STEP 4
# Create an ExpressRoute Gateway (Note: The process to set up the #Gateway can take 10 minutes or longer)
#Name of the Gateway Public IP (This will generate a Public IP for the VNet #Gateway and it’s only there if you wish to set up a separate VPN (like S2S)
$GWPublicIPName = “GwPIP”
#Give a name for the IP Configuration
$IPConfigName = “Ipconfig”
#Give a name for the ExpressRoute Gateway
$GWName = “ExpressRoute_Gateway_Name”
#PIP variable to store the AzureRm Public IP address (Allocation Method #choose “Dynamic”)
$pip = New-AzureRmPublicIpAddress -Name $GWPublicIPName -ResourceGroupName $rg -Location $rglocation -AllocationMethod Dynamic
#Subnet variable
$subnet = $vnet.Subnets[1].Id
#IPConfig variable to store the Virtual Network Gateway IP configuration
$ipconfig = New-AzureRmVirtualNetworkGatewayIpConfig -Name $IPConfigName -PublicIpAddressId $pip.Id -SubnetId $subnet
#Create the ExpressRoute Gateway (Gateway Type must be “ExpressRoute”)
New-AzureRmVirtualNetworkGateway -Name $GWName -ResourceGroupName $rg -Location $rglocation -GatewayType ExpressRoute -IpConfigurations $ipconfig
/*******************************************************/
STEP 5
#Link the ExpressRoute Gateway to the ExpressRoute Circuit
#The name of the ExpressRoute circuit – if unsure run the following #”Get-AzureRmExpressRouteCircuit” to identify the name given
$CircuitName = “ExpressRoute_Circuit_Name”
#Get Azure ExpressRoute circuit and store into the ckt variable
$ckt = Get-AzureRmExpressRouteCircuit -Name $CircuitName -ResourceGroupName $rg
#Give a name for the ExpressRoute Virtual Network Gateway Connection
$ERConnectionName = “ExpressRoute_Gateway_Connection_Name”
#Get Azure Virtual Network Gateway and store into the gw variable
$gw = Get-AzureRmVirtualNetworkGateway -Name $GWName -ResourceGroupName $rg
#Setup a new Azure Virtual Network Gateway Connection of type #ExpressRoute
$conn = New-AzureRmVirtualNetworkGatewayConnection -Name $ERConnectionName -ResourceGroupName $rg -Location $rglocation -VirtualNetworkGateway1 $gw -PeerId $ckt.Id -ConnectionType ExpressRoute
Note: The provisioning might take sometime. Once done you can test by accessing VM’s on either side. Make sure you allow the relevant ports from the Azure VM Firewall